Jobs
Jobs and workflows
A workflow consists of a series of predefined steps to perform a predefined action on the sample data: register or replicate a plate, solubilize a vial, etc. An instance of the workflow is called a job (for example, you want to register new plates from a particular file).
Workflow Steps
End-users are guided all along the various workflow-based processes used in sample management operations. Here are the common steps the processes will go through.
| Step | Description | Details |
|---|---|---|
| 1 | Job Initialization | Select a workflow, choose a name, assign the job to a specific user. |
| 2 | Requesting | Define the items that are going to be used for the workflow (the Source). Define the expected output of the workflow (the Target). In some workflows, a “Reorder” button allows users to reorder the requesting items. |
| 3 | Task Requesting | Add tasks that will be processed on the Source to create the Target. |
| 4 | Sourcing | Checks the consistency between the tasks and the source (e.g. sufficient quantity, source availability, etc.). |
| 5 | Processing | Central step of the workflow. A worklist is generated, summing up the tasks to process. Follow this worklist manually or provide it to a robotic equipment. Then, come back to Sample and report any difference between the expected tasks and what has been physically processed. When a vial is involved in a workflow (Source or Target), the Opening Date field is automatically filled in (if non-existing). |
| 6 | Storing (Output) | Assign a location to the newly created items. |
| 7 | Storing (Input) | Choose a location for the source items. |
| 8 | Pipe & Close | Display a summary for the job. Close the job, the user can choose to pipe it and start another workflow. |
Create a job
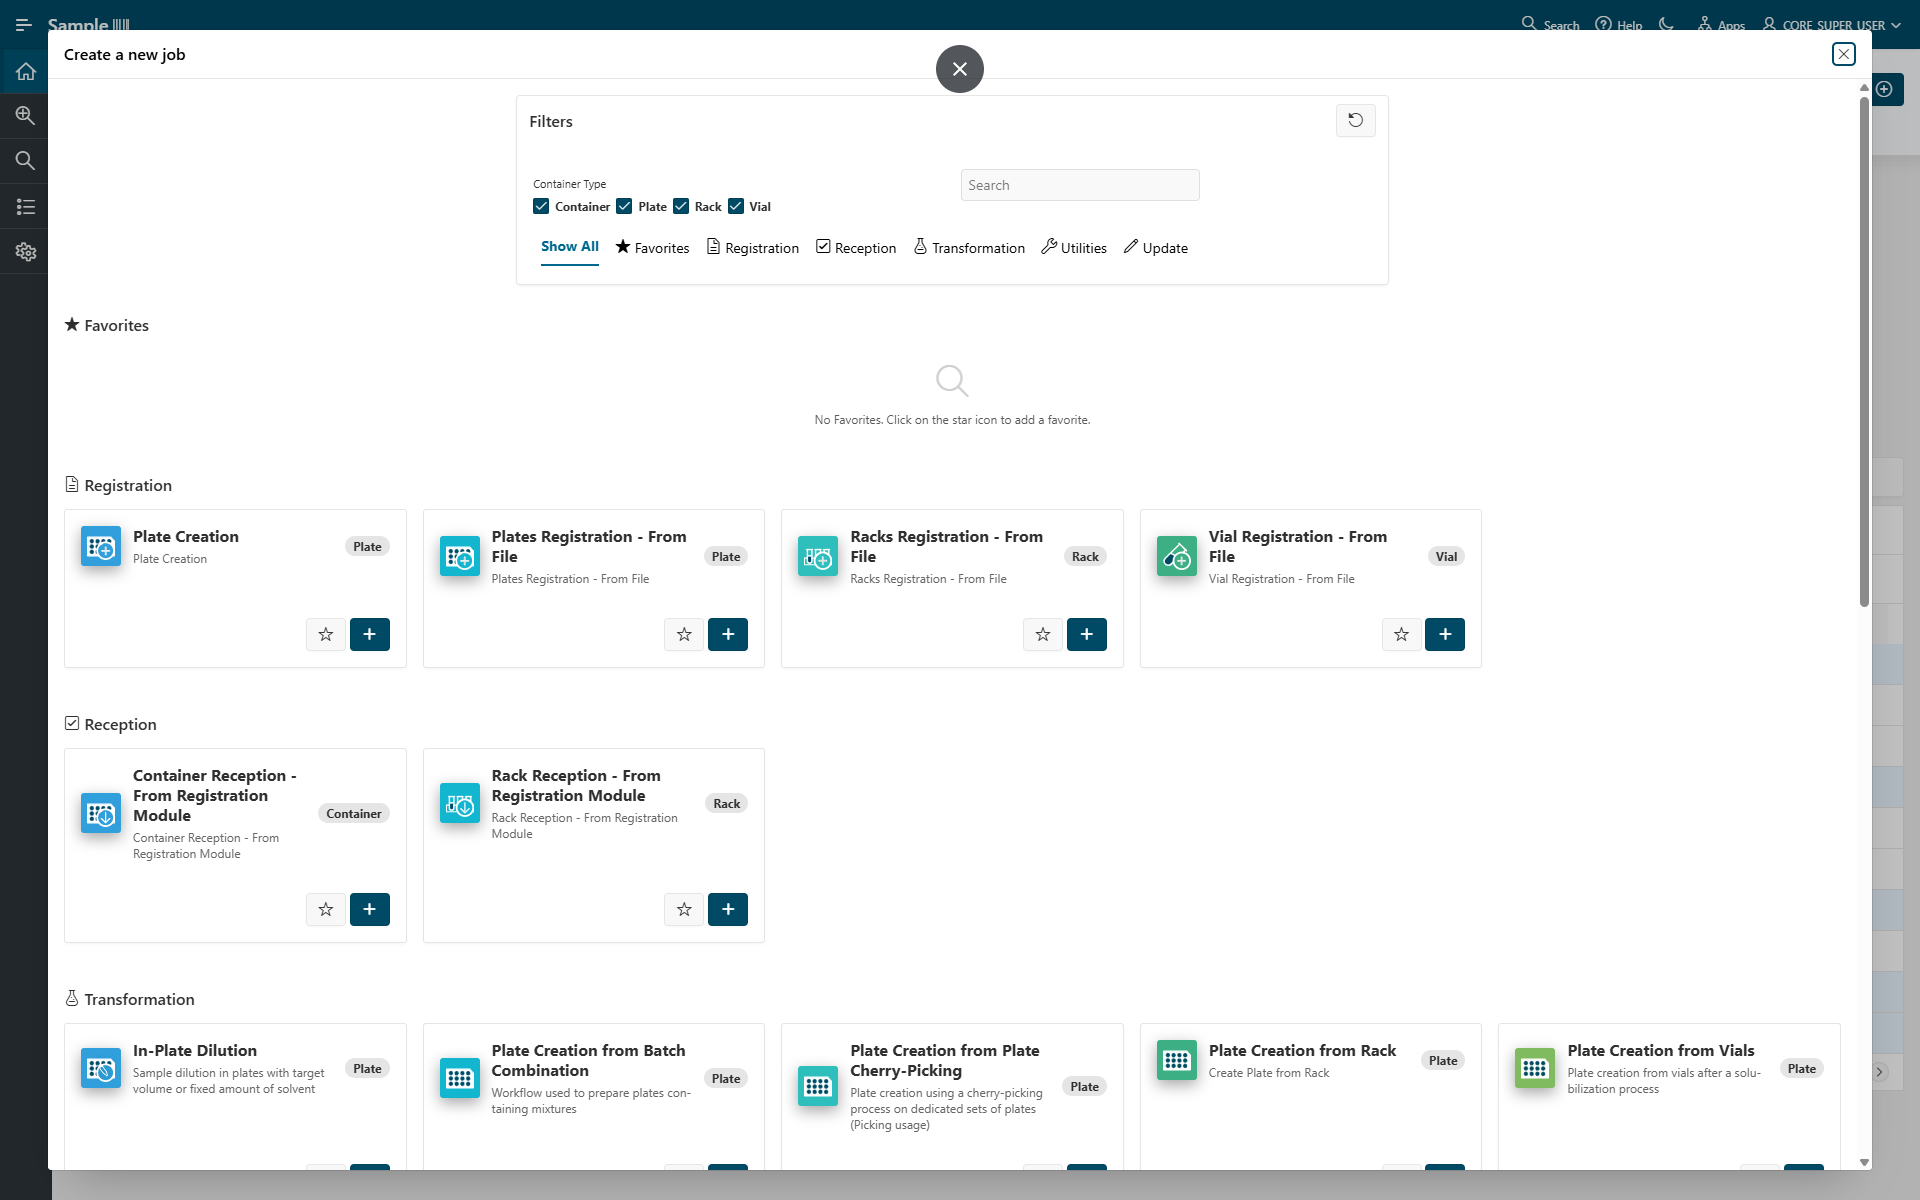
You can create a new job by clicking on Create New Job from the home page.
Then, you will have to select the workflow you want to create
After you select the workflow, you access the page of job initialization. You can specify a Job Name, and a template if necessary.
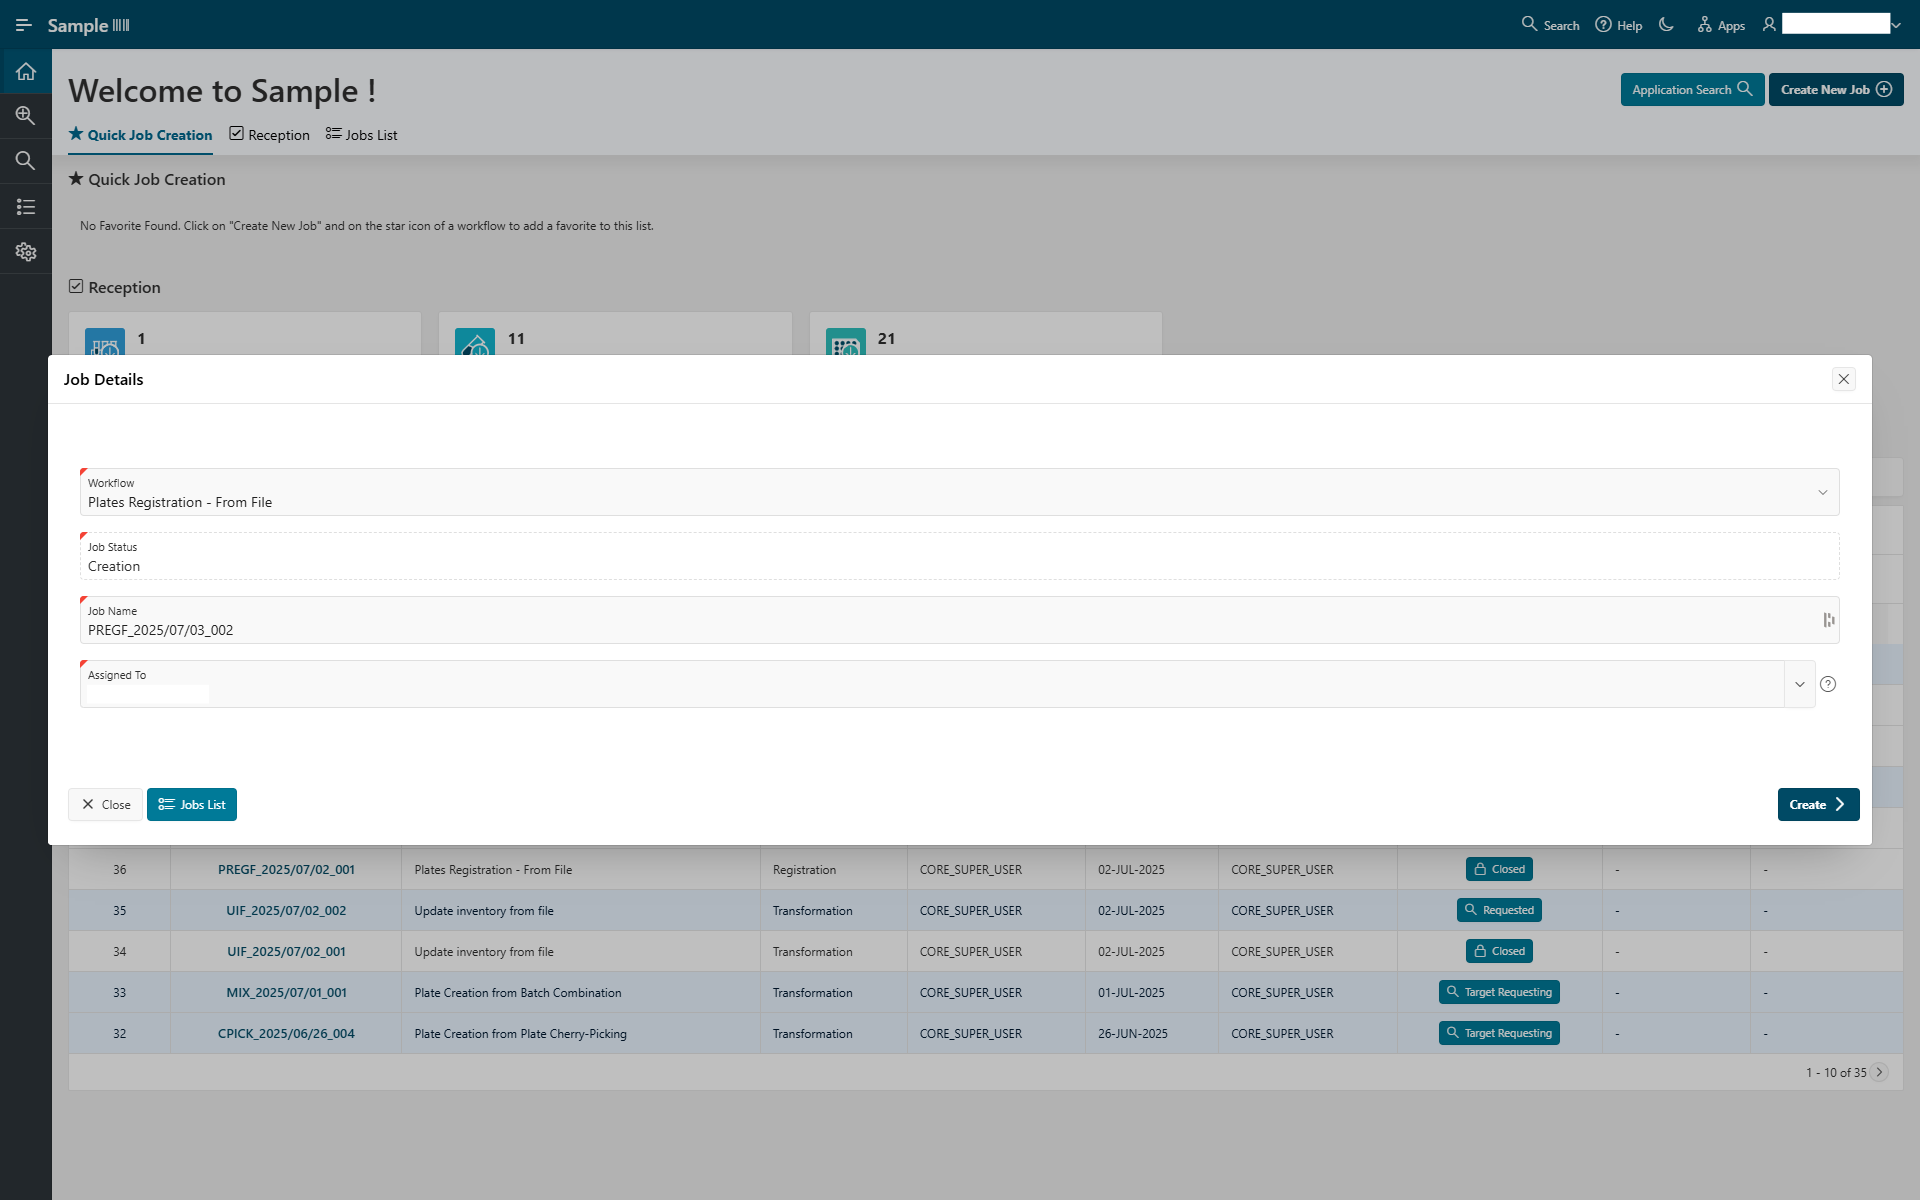
Then click Next to start the workflow.
Storing
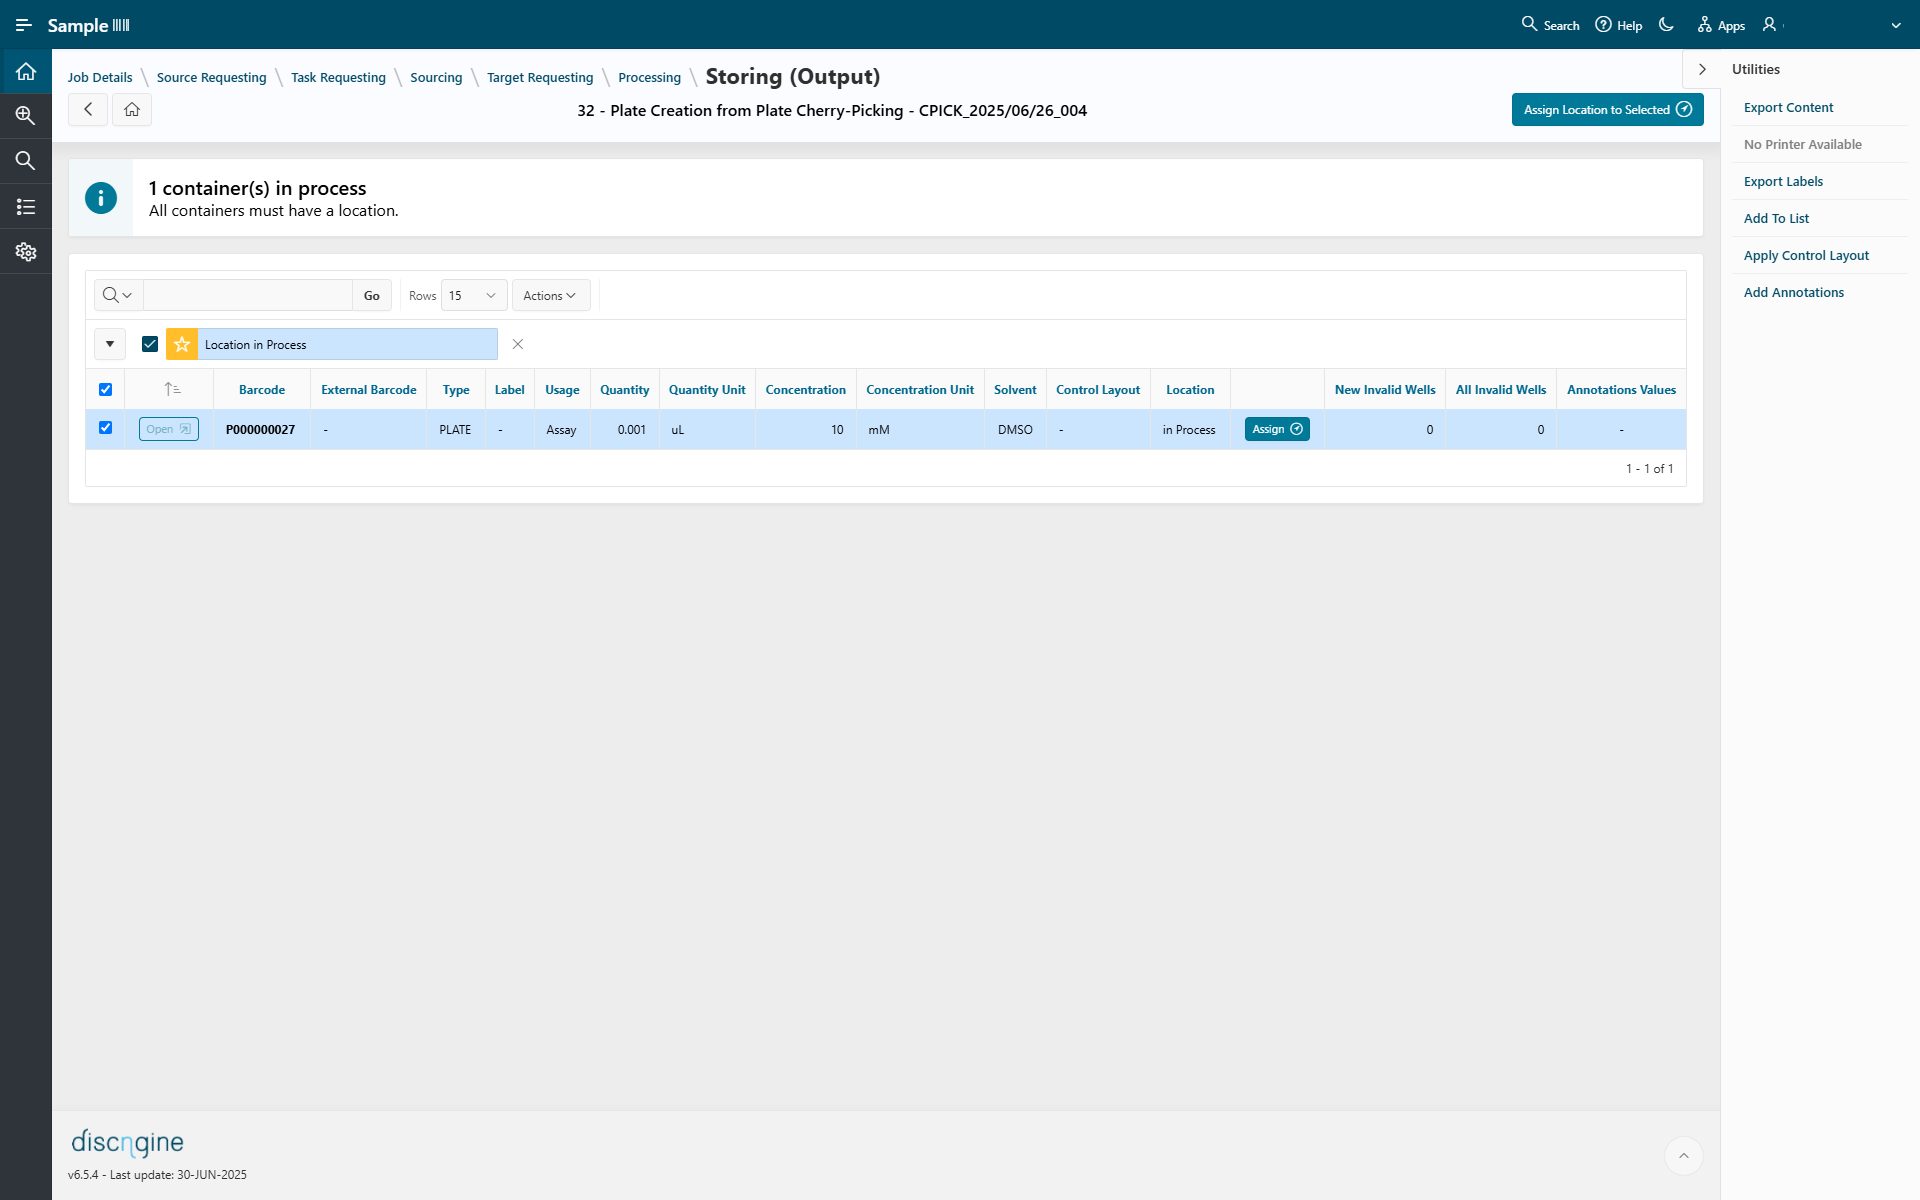
The Storing pages allow you to assign a location to containers. This can be for output containers (created during the job) and/or input containers (existing containers processed in the job).
For each storing step, you have a report of all containers. You can click Open to access the container details.
From this page, you can assign a location to containers by clicking Assign Location to Selected.
You can also add containers to a list, apply a control layout, or add annotations by selecting containers and clicking the appropriate button in the Utilities panel on the right.
Pipe & Close
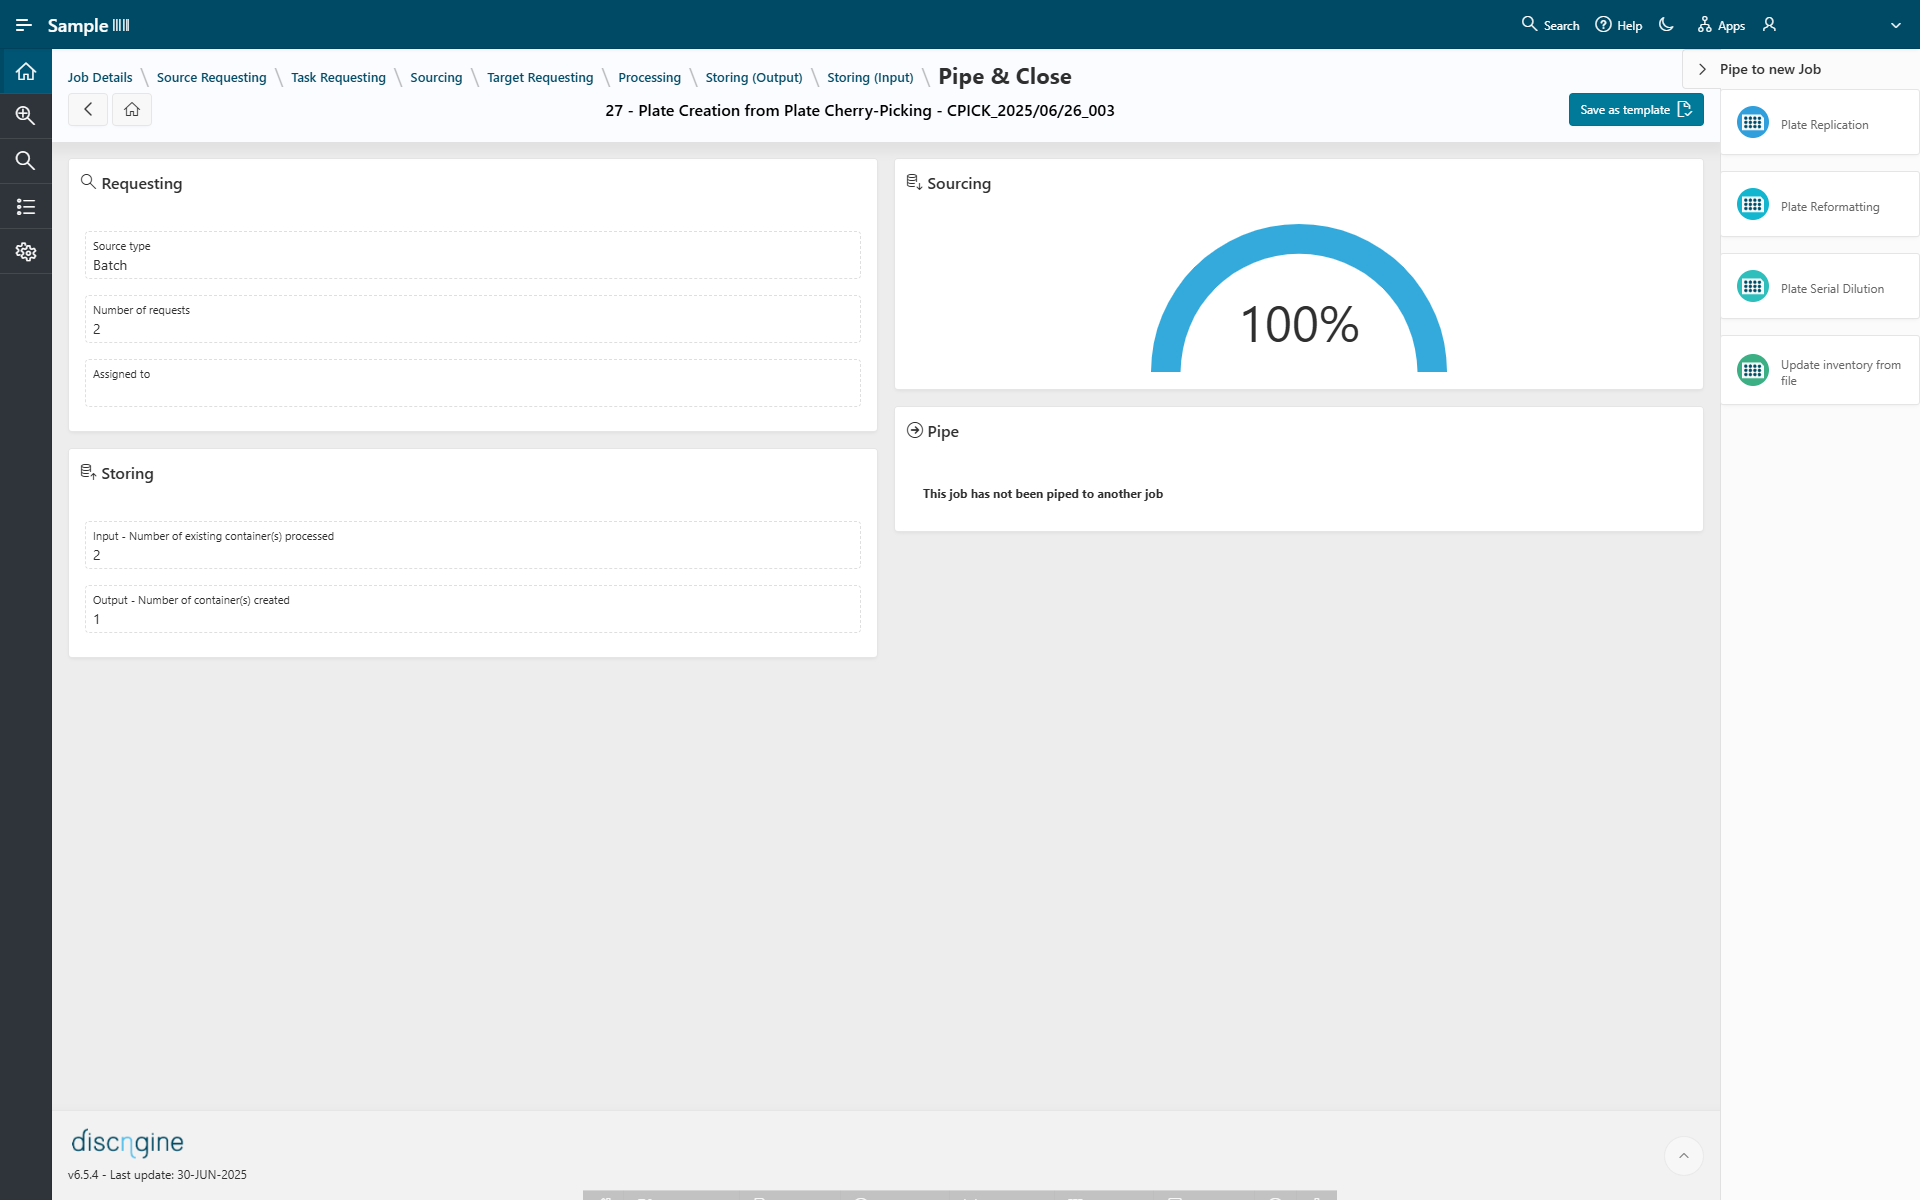
The Pipe & Close page is a summary of:
- Requesting: number of requests and source type
- Sourcing: percentage of containers sourced
- Storing: number of existing containers processed and number of containers created
You can save the job as a template by clicking the Save as Template button and then use it for a new job; some steps will be automatically filled according to the template.
You can also pipe this job to another one, allowing you to immediately start a new job using the output or input plates from this one.
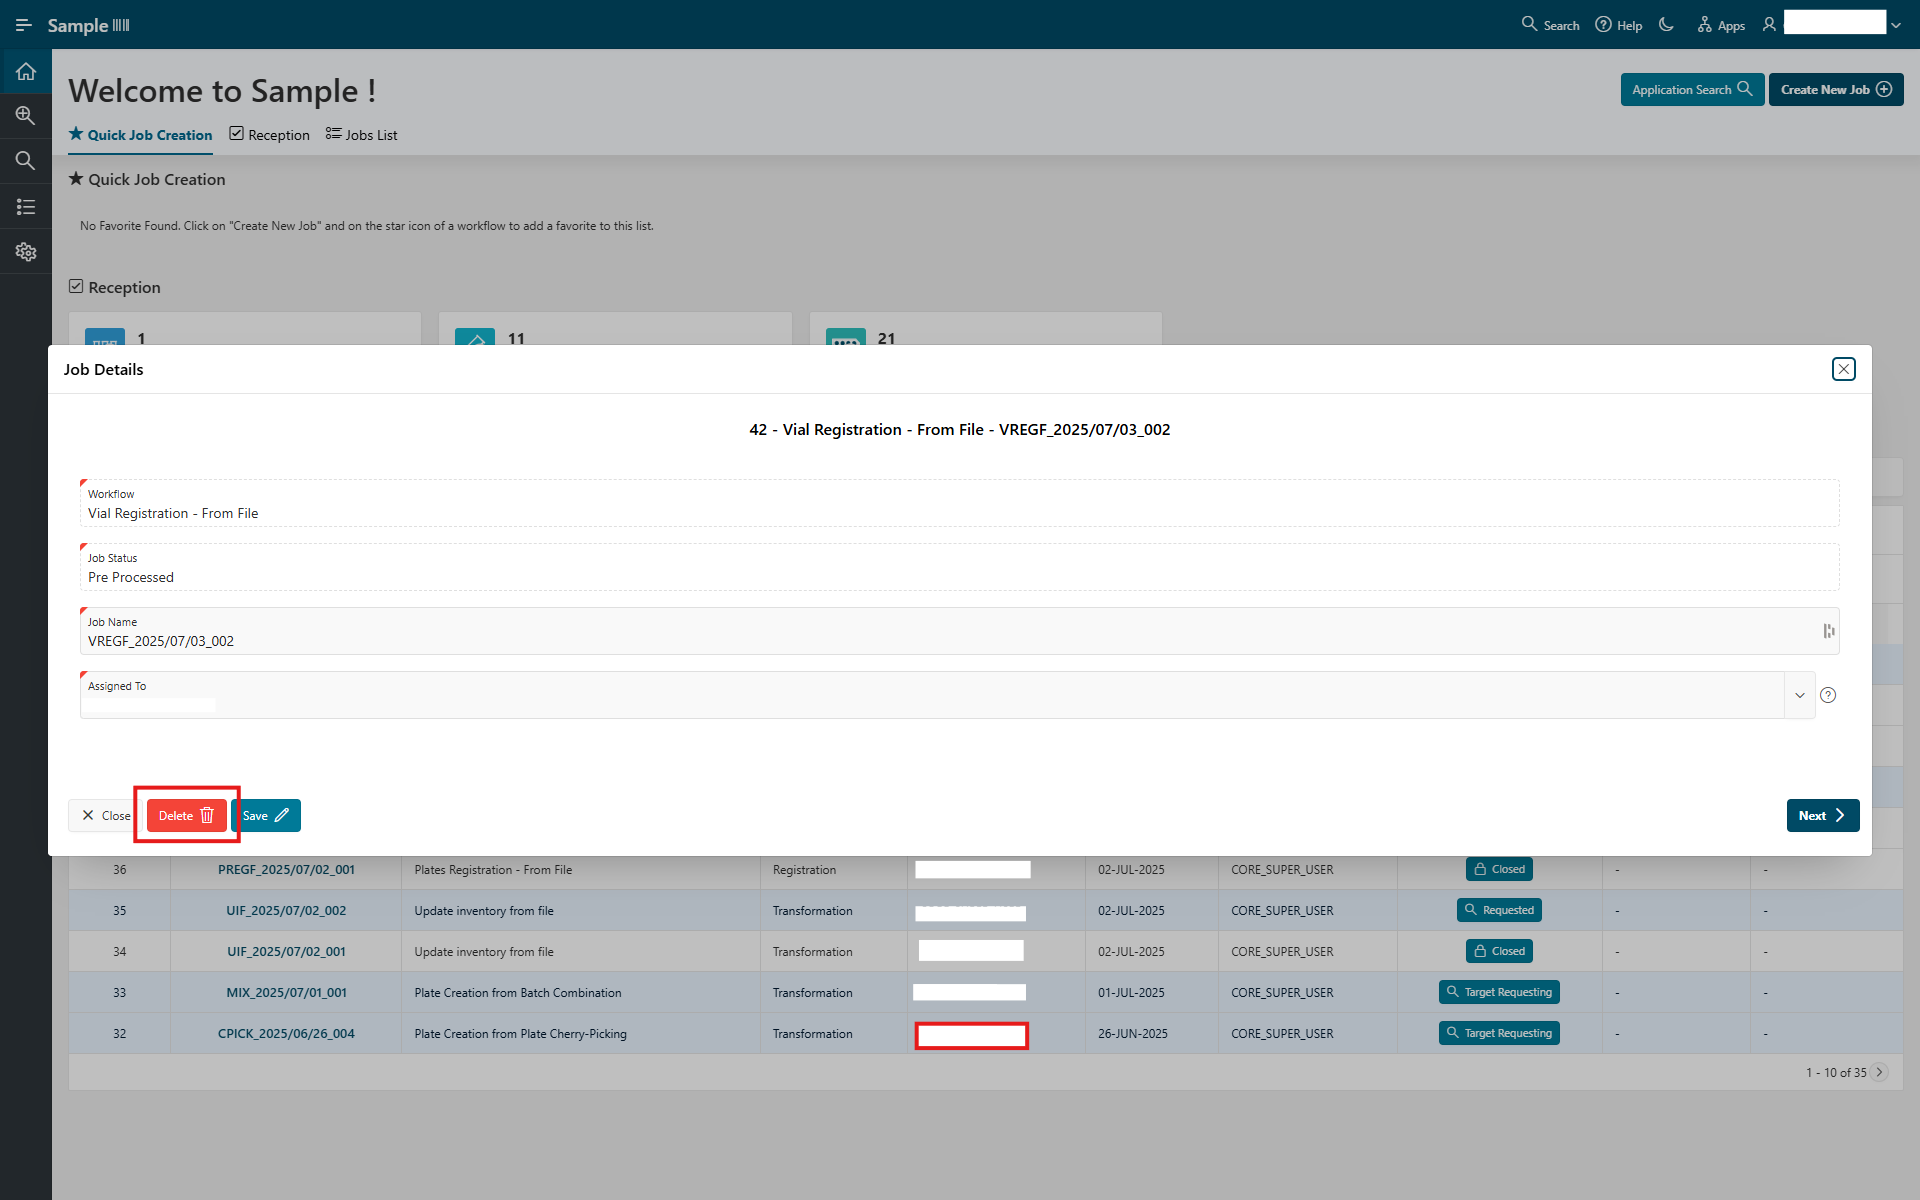
Delete a job
A job can be deleted only if it has not been processed yet. To do this, go to the job details page and click the Delete button. A warning will prompt you to confirm the deletion.
Workflow Navigation
While navigating in Sample, a navigation aid known as a “breadcrumb” is displayed at the top of the page.
It provides information on your current location in the application workflow.
For example, the breadcrumb illustrated below indicates that the user is currently on the Storing (input) page and that they went through the previous steps of the workflow.

It improves navigation when going back several pages.
- The
Previousbutton is used to go back to the previous step. - The
Homebutton is used to return to the Sample Home page.

Through the breadcrumb, you can jump directly to any step by clicking its name.