Tutorial - Rack Replication
Introduction
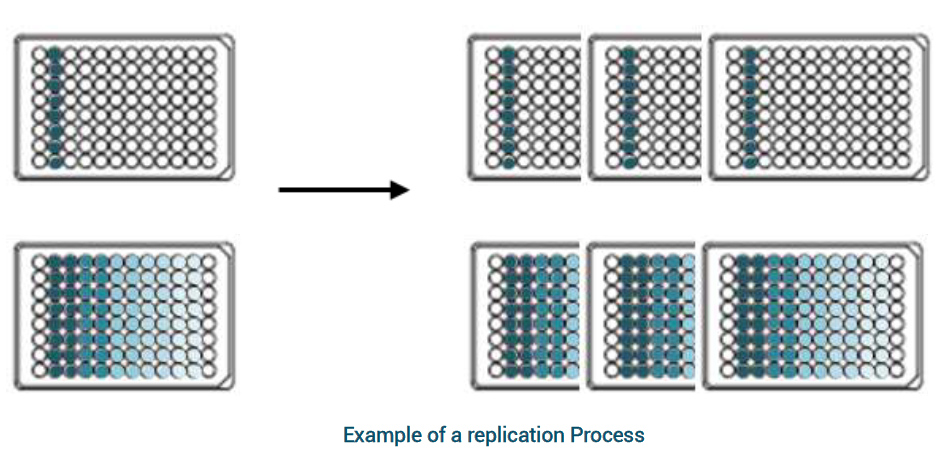
In this tutorial, you will create two copies of five 96-vial racks (100 μL – 10 mM). The resulting vials will each have a volume of 30 μL and will be diluted by a factor of 10 (resulting in 30 μL – 1 mM).
Prerequisites
Required permissions and setup
Sample Processing role is required to access this workflow.
Required system configuration:
- Location Type
Rackwith Rack Mask(s): 96 and 384 (if you want to create a 384 well tube rack), - Container Usage
Inventory, - Solvent
DMSO, - Worklist Generator and Parser:
Standard (Container) (;)
These should exist by default in the Sample application.
Items
Racks from Discngine Sample’s automation will be used:
- 5 racks 96 (100 uL – 10 mM). Layout with columns 1 and 12 as empty,
- Location
Paris > HTS Lab > Freezer1Automation is running during installation if “example_dataset” is set to true in the configuration file.
Workflow
Job Initialization
Create a new job and select the Rack Replication workflow.
Requesting
- Select Rack as Source Type
- Choose Target Rack Barcode as Generate New Barcode
- Select 96 (8x12) as the Target Rack Type
- Specify Request from Text
- Copy and paste the rack names in the text area: R00020:R00019:R00018:R00017:R00016 Rack names can be separated by colons or line breaks.
- Click
Add IDsto confirm. The racks are listed in the added requests. - Click
Next.
Task Requesting
- Choose Source Selection Mode: All sources
- Target Usage: Inventory
- Select Number of Copy: 2
- Target Volume: 30 μL
- Dilution: Target
- Dilution Mode: Dilution Factor
- Dilution Factor: 10
- Buffer (Solvent): DMSO
- Offset Volume: 0 %
- Offset Solvent: 0 %
- Click
Add Task. Two tasks are added (one for each copy). - Click
Next.
Sourcing
The Sourcing page will confirm that the requested operations are compatible with the source racks (see the Sourced column).
- Click
Next.
Processing
For processing, requested tasks are translated into a worklist that you can feed to your robotic equipment.
- Select the Standard (Container) (;) equipment and set File Order to By Request.
- Click
Generate worklist.
A worklist file appears in the Worklist Generator area. It contains the requested tasks to execute. The Worklist Parser area expects a file containing information about the tasks that were actually completed. By default, the generated file is set in the Worklist Parser. For this tutorial, we assume that every task was completed successfully, so we’ll keep this default file.
- Click
Copy Worklist. - Click
Nextto propagate these changes in the system.
The tasks are processed in the Sample application.
Storing
The Storing step allows you to assign a location to the items involved in the job. First, for the output racks (racks created during the job):
- Click
Assign Location to Selected. - Select Paris > HTS Lab > Freezer1 and click
Selectto confirm your choice. - Click
Nextto continue to the input racks. Here, we won’t change the input racks' location. - Click
Next.
You can increment the Thawing Cycle count of the input racks if necessary.
Pipe & Close
The Pipe & Close step provides a summary page where you can review the job and optionally pipe it to another workflow. You can also pipe this job to another one, allowing you to immediately start a new job using the output or the input racks from this one.
For this tutorial, click Close & Quit to finish the job.