Tutorial - Plate Creation
Introduction
In this tutorial, you will be guided step by step through the creation of a plate containing a liquid batch, from job initialization to final storage and closure.
Prerequisites
Required permissions
Sample Registration role is required to access this workflow.
Workflow
Job Initialization
Create a new job and select the Plate Creation workflow.
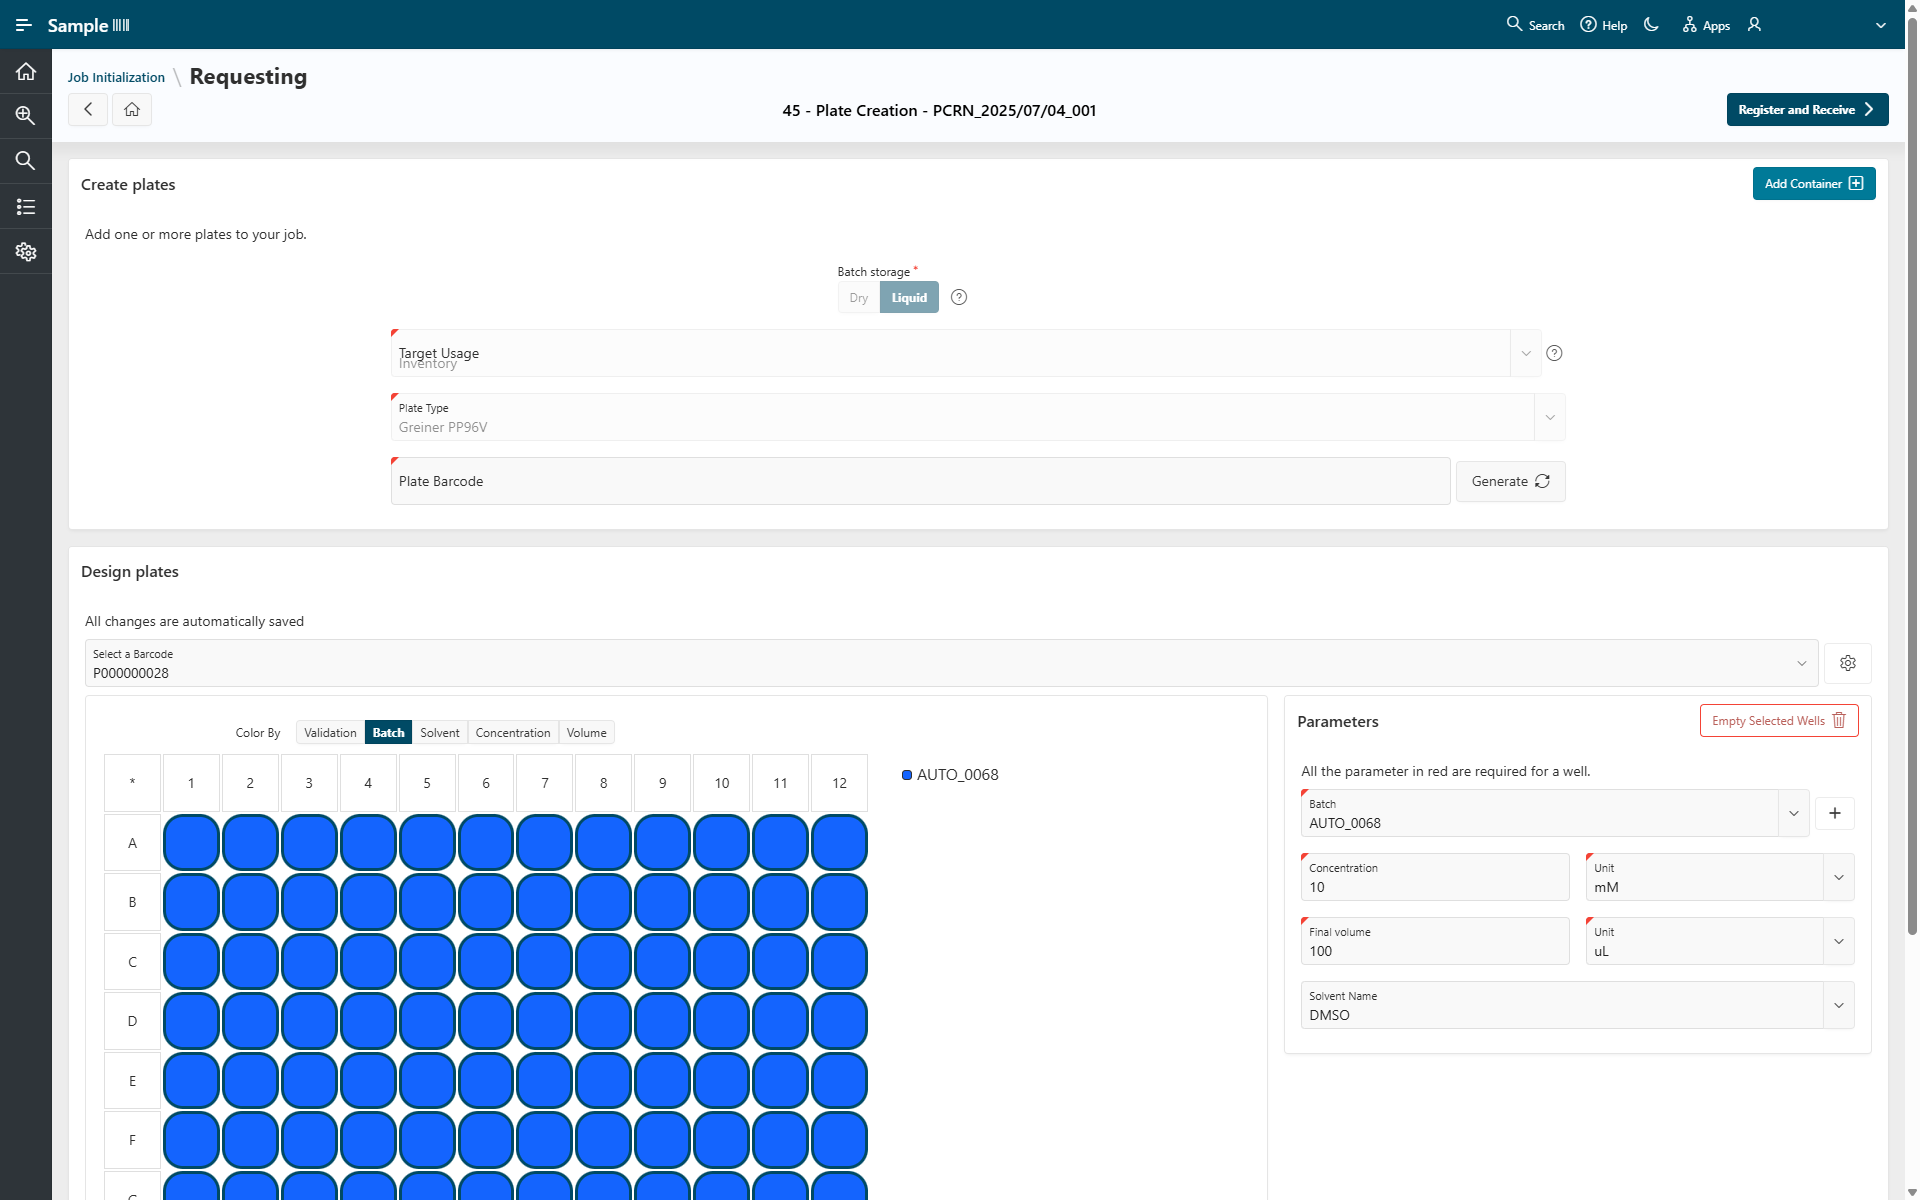
Requesting
- Select Liquid as Batch Storage.
- Select Inventory as Target Usage.
- Choose Greiner PP96V as Plate Type.
- Click
Generatefor the Plate Barcode. - Click
Add Container.
The plate layout is displayed.
- Select all wells by clicking the star at the top left corner of the plate layout.
- Select Batch AUTO_0068.
- Select a concentration of 10 mM.
- Select a final volume of 100 µL.
- Choose DMSO as Solvent Name.
- Click
Register and Receiveto save the plate.
Storing
The Storing step allows you to assign a location to the items involved in the job. Here, you assign a location to the output plates (plates created during the job).
- Click
Assign Location to Selected. - Select Paris and click
Selectto confirm your choice. - Click
Next.
Pipe & Close
The Pipe & Close step provides a summary page where you can review the job and optionally pipe it to another workflow.
For this tutorial, click Close & Quit to finish the job.